

Many commercial soaps include perfumes, detergents, surfactants, and water conditioners that, if deposited in a river or stream, might have a negative impact on plants and wildlife. Natural soaps (both bar and liquid) may, however, be produced to be extremely safe and biodegradable.
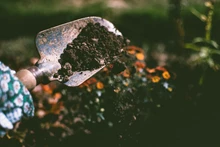
How To Make Your Own Eco-Friendly Soap
Basically, you don't want to use any artificial colours or scented oils in your soap (bar or liquid). Essential oils that are safe for people are fine to use because they are natural materials that will deteriorate over time. Natural colorants are also acceptable, but they are unlikely to be required in this soap.
The biodegradability of the soap is unaffected by the oils used as long as they are natural (animal or vegetable). If you have organic oils on hand, that's fantastic, but don't worry if you don't. It's commendable to go through the extra effort of using solely organic oils in your soap, but it's not essential.
To get you started, here is the natural soap-making recipe:
Bar Soap Recipe
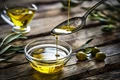
Olive oil, coconut oil, and soybean oil are all used in this recipe. Because of the environmental concerns surrounding palm-oil harvesting, avoid using it to make an ecologically friendly soap.
The following ingredients make up the recipe:
Olive oil (50%)
Coconut oil (30%)
Soybean oil (20%)
The following ingredients are required to create approximately 1 kilogram of soap:
Olive oil: 450 grams
Coconut oil: 270 grams
Soybean oil: 180 grams
Sodium Hydroxide (Lye): 125 grams
Water: 325 milliliter
Instructions
1. Measure both Water and Lye
Place a pitcher on top of the scale and set the weight to zero. Fill the pitcher with distilled water until it reaches the weight specified in your recipe.
On the scale, place a mason jar or a plastic pitcher and zero out the weight. Toss in the amount of lye specified in your recipe. Close the lid securely and store it somewhere safe.
2. Mix the Water and Lye
Slowly pour the lye into the water in the pitcher. Don't do it backwards, and don't produce any splashes when you're pouring. Gently stir the mixture until the lye has dissolved. It is to be expected that the mixture will heat up. Location the lye-water pitcher in a safe place after closing the lid.
3. Weigh the Oils
After you've measured each oil, subtract the weight from the total. Pour it slowly, you can always add more, but once the oil is in the mixture, it's completely mixed in.
4. Heat and Melt the Oils
Place the solid oils in the soap-making pot on the stove over medium-low heat. Slowly melt the oils while gently stirring. A thermometer may be used to keep track of the temperature. When the oils reach around 110 degrees Fahrenheit, turn off the heat. Continue to whisk until all of the solid oils have melted.
Add the room temperature liquid oils to the soap pot once the solid oils have melted. The total temperature is lowered as a result of this. When you add the lye-water, the oil mixture should be around 100 degrees Fahrenheit.
5. Add the Lye Solution
Take out your trusty stick blender, but don't turn it on just yet. Pour the lye-water mixture into the soap pot slowly. The oils will get hazy almost quickly. Blend the lye-water into the oils with the stick blender as a spoon, but without turning it on. The saponification process, or the chemical reaction that converts your mixture into soap, starts here. Place the lye pitcher in a secure location.
6. Mix the Oils and Lye
Turn the stick blender on and off in brief bursts while stirring the lye water and oil combination. Begin by blending for 3 to 5 seconds. Then turn it off and give it another stir. Rep the procedure, mixing in brief bursts until the oils and lye-water are well combined. It is approaching a trace at this stage, indicating that emulsification has happened.
Dip a spoon into the mixture and let it trickle back into the saucepan to see whether it has reached a trace. Even though the mixture isn't thick yet, if it leaves a trail on the spoon, it's ready.
7. Add Essential Oils
Slowly add any essential oils from your recipe to the soap mixture once it is thoroughly mixed, but before it becomes too thick. Stop mixing the mixture with the stick blender and just use the end of the stick blender as a spoon.
8. Pour the Soap Into the Mold
The soap has thickened at this point. Pour the raw soap into a mold and distribute it evenly with a back and forth motion. As the saponification process begins, the soap mixture warms up. If the environment is cold, wrap a towel around the mold or place it on top of it to keep it warm and the reaction going.
9. Clean up and Let the Soap Saponify
Place the soap in a secure location and forget about it. The soap takes about 24 hours to firm sufficiently to remove from the mold and slice. It should be firm enough to unmold and slice the soap after it has set for around 24 hours.