


Hydroponics is a method of cultivating plants in which they are immersed in a nutrient-rich solution of water. Instead of soil, fluid touches the roots of plants and assists them in growing. Furthermore, the plants will be able to get a good amount of oxygen, which will enhance their growth.
This Dutch Bucket system is, by all means, a suitable hydroponic and outdoor hydroponic set-up for any indoor grower as well as for any outdoor grower.
It may be used for both hydroponics and aquaponics, giving the most versatility for growing diverse plants, since Dutch bucket systems are simple to install, affordable to maintain, and can be expanded to any size, due to its configurable features and flexibility in arrangement.
Dutch Bucket Hydroponics
A Dutch bucket, or Bato bucket, is a hydroponic system that connects two or more growing containers to the same irrigation and drainage system. Dutch bucket hydroponics consists of three elements: circulation, drainage, and timing. This system starts with a reservoir that contains enough nutrients and water to supply each bucket. Through an irrigation line, the reservoir's water is pumped to the buckets.
The drip emitters on this irrigation system allow water to reach the growth media in each bucket. Water is available for each plant, and any surplus runs through a single drainage channel. Due to this, the extra water rushes back to the reservoir where it was first collected. A combined irrigation and drainage system can recirculate water and far more efficient than conventional methods.
Build a Dutch bucket hydroponic set up at home
In the interest of simplicity, let's assume a grower wants to design a Dutch bucket system. Below are some steps you should take.
-
Make sure to leave space at both ends for the end cap and elbow of the PVC, or cut the PVC down to 8 feet or the length of the table. If necessary, cut the PVC to fit the table.
-
As you decide on the spacing for the Dutch buckets, mark where the drains should go on the drain line for each bucket. Drill holes on the marks using a drill and a 1-inch hole saw.
-
Attach the PVC endcap and elbow with primer and PVC cement, making sure the elbow faces downward and the holes in the PVC face upward.
-
The PVC should be attached to the table with zip ties and held in place with holes drilled in the table surface. In place of zip ties, you could use a 1.5-inch conduit clamping. Fasten the 1/2-inch tubing to the buckets by running it along the middle line and using clips or clamps to hold it in place. Leave a few feet at the end to reach the pump in the reservoir.
-
For each clamp, drill one or two holes using a 1/8-inch drill bit. These are where we will place drip emitters.
-
Next, you should cut the irrigation line and add the release valve, which is good for flushing the system and draining the reservoir. Use a pipe clamp to secure it.
-
Attach the drip emitters to the 1/4-inch tubing by cutting 16 5-inch strips. Centre the strips so that the drips fall directly on the plants.
-
Connect the tubing to the pump and fasten it with a pipe clamp. Insert the pump into the reservoir. Make sure the drip emitters are working and that no leaks appear in the hydroponic system.
-
You can then plant your crops in the media. Fill the container with a combination of perlite (the most popular filler) and hydroton (which keeps the perlite from blowing away in the Wyoming wind).
Working principle of Dutch bucket hydroponics system
The first thing you'd notice is that there are several buckets on the bench or table. They can only accommodate one plant each. Ideally, these buckets will contain growing media (perlite, vermiculite, etc.) to maintain moisture, aeration, and support the plants. Water and nutrients are stored in one large bucket.
In this reservoir, a submersible pump pumps nutrients into drip lines or irrigation channels, where they are then applied to plants through drip emitters. A drip emitter is attached to the drip line or irrigation line and is pointed at each bucket to deliver water to the plants. There is an elbow at the end of each bucket. A drip line is used to drain excess nutrient solutions to the reservoir, and then to return them. Therefore, nutrient solutions are not lost during the watering and feeding process, making this a highly effective recirculation technique.
If this happens, the grower can run the pump continuously without stopping for 24 hours. When the pump pumps nutrients and waste onto the drip line and buckets, gravity will drain them back where they came from. if you don't want the nutrients to return to the reservoir, you can have them drain out of the system, called flow-to-waste. it does help solve the problem of nutrient unbalancing. Over time, plants will take up some main nutrients, creating an unbalance of nutrients in the system. Nutrient unbalancing is not good for plant growth.
If the drippers are set up well, growers can let the system run continuously without worrying about suffocating and drying out plants. But you’ll need to check and change the nutrients in the reservoir will need to be checked and changed at various intervals. Nutrients are mixed or diluted in the reservoir depending on the number of plants or buckets and the size of the reservoir. The pumps can be used if you want set intervals for the flooding circle.
Growing media for Dutch bucket hydroponics system
To maintain moisture, ventilation, and to support plants to stand upright, buckets should contain growing media (perlite, hydroton, and coco peat, etc.).
Perlite
With perlite added to the soil, airflow is greatly increased, which is essential for the roots of your plants to breathe. This mineral glass helps to slow down compaction, keep soil fluffy and lightweight because it is harder than the soil around it.
Hydroton clay pebbles
Extremely stable at both pH levels and EC levels. Made from 100% natural clay. As it drains freely and does not hold excess water, it provides oxygen levels around the roots, making it an ideal choice for flood and drain, multi-pot and drip irrigation systems.
Coco peat or coco coir
Coconut husk is a renewable media that is extracted from coconut peat. The material can be pressed into a variety of shapes and sizes to suit all growing applications.
Different plants for Dutch bucket hydroponics
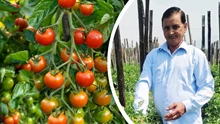
You can grow a variety of plants with the Dutch bucket system. It also allows growers to grow large, vining, fruiting crops or any plant that needs a high amount of nutrients. Dutch bucket system, you can grow cucumbers, peppers, potatoes, squash, and pole beans. Commercial hydroponics commonly uses Dutch buckets for growing tomatoes, but you can grow virtually any vine plant. Tomatoes, cucumbers, beans, peppers, and eggplants grow well in Dutch bucket hydroponics. Normal seedlings are started in rock wool 1.5-inch cubes, and when the plants reach a height of 8-12 inches and are ready to be clipped up to the plant support system, they are ready to be transplanted into a Dutch bucket system.
Advantages of Dutch bucket hydroponics
-
Dutch buckets are ideal for fruiting plants, bushy plants, and vining plants like peppers, tomatoes, and cucumbers. This system is space-saving, especially for high vining and large crops.
-
Flexible in size and setup - Can scale to any size growers want convenient for pest management even if it occurs in one bucket as each bucket can be replaced without affecting the entire system.
-
Recirculation system – When you use the Dutch bucket system with a return line, all the drained water and nutrients return to the reservoir.
-
This is an excellent hydroponic technique for beginners. It is simple to set up. Starters can grow tomatoes and peppers in Dutch Buckets and enjoy great results.
-
It is a well-managed system that can conserve water and large amounts of nutrients, even in a flow-to-waste setup system.
-
This system works well in controlled environments for year-round growth. Compared to conventional methods, they help save space, mainly for vines and large crops. The majority of set-ups reduce labor for many plants.
Common mistakes to avoid for growing plants in a Dutch bucket hydroponics
-
Failure to understand the relationship between fertilizer strength and irrigation timing can lead to rapid failure in any Dutch bucket hydroponic system.
-
It is possible to use some media for multiple growing seasons with additional care to avoid bacterial or fungal problems.
-
Due to the high density of Dutch buckets, bacterial, fungal, and insect problems can spread quickly.


Share your comments